“Florentine Plaster”

The incredible Florentine plaster is an easy, yet gorgeous faux finish technique. Still, after about twenty years, one of the best sellers. FP looks like a multi layer technique, but is not. Production is fast, easy and can not be compared to other textured techniques, due to inexpensive application. Contemporary, modern or electic, take your pick, Florentine Plaster will always be the "talk of the party"

“Croco”

An exquisite crocodile leather look alike faux finish. Designed and created for a famous baseball player. The king size bed, custom made to highlight this faux wall finish. Mediums used: Water Putty, Olive oil, gift-wrap etc.

“Grandeur”

(`granjər,`granˌdyo͝or/) noun: splendor and impressiveness, especially of appearance or style. The dictionary says it all. This grandiose faux finish was created with MM metallic plaster, gold powder and assorted MM metallics.

“There's No Crying in Baseball”

An extremely fast and effective wall glazing finish resembling a baseball. Created with paint only.

“Tuscany”

I found this beautiful faux finish in Florence, Italy in the Orsini Palace.

Welcome to My Home

Hello and Welcome!! My name is Heidi and one of my passion is faux painting. However, there are otherpasions and I live them daily. Take your pick. Interior design, decorating on the shabby side, gardening, herbs, fashion, culture and and last but not least "Style". In my world, the day should have 48 hours and more.

I am here to share some of my adventures with you, because I love to share and teach. I hope that you come by often and stay a while. Thank you for sharing your time with me.

Friday, January 24, 2014

Painting Upholstered Furniture


Wow, I am embarrassed and guilty. BUT, I just did not have time or energy, to enlighten you with my thoughts, work and ideas. I was several times in Germany last year, and going again this year. My health was dilapidated, doing much better now. I was in Dallas, teaching the Idal chapter. Met  wonderful faux finish artists and made new friends. Thank you IDAL Chapter Dallas/Ft. Worth.


Anyway, many of you know, that I am sharing my home with Bella


and my sweet cats "Bärli and "Sammy"


Don't' they look like they are "trouble free"?    NOT!!!!!


I don't believe in de-clawing my sweethearts, thus they developed a very bad habit. They are ripping my furniture to pieces. And that is like a thorn in my eyes.


After deciding not to order slipcovers, because they too would be ripped in a short while. I did what I know best. I decided to paint my upholstery. I am a firm believer, that everything can be painted.

Years ago I painted my kitchen counters and I really got in trouble for it. Colleagues, friends and family, claimed that I would poison them and that the finish would not last. Well, we know better now. My family is still kicking..... and the finish did last.

Back to my upholstery. I messed around with paint etc. and came up with a paint recipe, which I am still experimenting with. However, I did paint my chair and I love it. In the beginning the fabric was kind of stiff, but it has become much softer. The chair is very easy to keep clean(washable), feels kind of cold, like leather. I don't mind that. But, what I really, really love...... Bärli and Sammy  don't like the chair any longer. That is a great bonus. Pretty soon I will be working on the rest of my furniture. I will keep you posted.

Here the results:

Sorry my first banner!!!


First paint strokes. I am  wondering "is this crazy"? 

First coat completed. See all the rips and tears?


Second coat completed. Now I began to sand, sand, sand and applied an additional coat. Thoroughly sanded again. Never did I say, that it would go fast. Just to make sure I applied a fourth coat. And ....here it is......My new jewel!!!!  To all my friends, clients and colleagues......Guess you have to eat your words. LOL


I used Plaster of Paris, mixed it with Downy to a smooth paste (yoghurt), added it to flat paint to thicken the paint. Sprayed the furniture before painting with Fabric medium. Kept the furniture somewhat damp, so the paint would spread better. And sometimes, when I thought it was necessary I sprayed  the  still wet painted areas. 

In the meantime, I have started with my red couch and changed the recipe a little to

replacing the Downey and fabric medium with water. Stay tune......

Take care and be save, until next time.....

Heidi

PS: Preview.....I am bringing back a eighties kitchen to this Century......and mostly with paint


Before. Kitchen with oak cabinets, melamine counters and wallpaper.


Stay tune and see how this becomes an HGTV jewel


Friday, October 18, 2013

I missed you all


....and I am feeling the ever so painful "Guilt".

I don't even know how to start this post. For days, I have been thinking about a "catchy" headline (according to the wisdom of many professional bloggers, a catchy headline is an absolute "MUST"). I am wondering if I have I succeeded with this "headline" thing? But this "Headline" came from the heart!


I do know that my limited English is one of the reasons I seem to suffer from a self-inflicted pain, called writer's block. But, I want "the show to go on", consequently, I do hope that you overlook my "accent". All of the above  being said, I also must tell you:

  • I love and appreciate your comments.
  • I really did miss you and I appreciate each one of you.
  • I hope that I will see you again and often.
  • I will try to overcome my accent complex......
And BTW, in Germany and Austria I am always being asked where I learned such good German? My native tongue is German. However, living for such a long time in the USA, it seems that I have developed a heavy American accent, speaking German. I am homeless, and I can't win for loosing.!!!!!!!!!!

During my long silence, I was not idling in La, La land. I was ill for a long time, but now I am much better. I traveled several times to Europe, teaching these German master painters the art of faux painting. My, my, there are only male painters!!! It is extremely hard to get them to believe that they can actually design and create a beautiful wall finish, instead of just whipping out a fan deck


Another apparent and challenging difficulty I constantly come across, is to convince these budding faux finish artists to create sample boards. The sample boards are created by manufacturer reps and sales representatives who I also trained. Yes, it is true..... the painters just call and request a sample board and the reps oblige. Totally hard for me to understand!!!! And I am being told that I can not change the "German way".


  • I finished some really great projects, which I will introduce here soon, if not sooner. LOL
  • I taught several classes, one of them in Dallas, the local Idal chapter.
  • I am re-inventing myself and trying to "smell the roses" at times. One of my students told me come up for air and breathe a little. Kathy, I am trying very hard!!!!! LOL.. 
  • I finally created a  German blog

Again, I miss you all. I am glad to be back and please stay tune and check out the completed projects:
.
  • Before and after.... Bringing a dated dining room to today's style.

    Before


    After- Back to the Future - Classic and up-to-date


    Sending blessings and good wishes,

    Fondly,


Monday, March 26, 2012

99 bunte Ostereier!!!


Noch ganz schnell ein paar kreative Ideen für Eure Ostereier. 


Blümchen herstellen: Mit dem Locher ausstanzen und auf das Ei kleben.Southern Living.com


Sorbische Ostereier sind die schönsten der Welt
Sorbische/Batik Kunst


 Ostergrüße! Eier in Tee färben und dann beschriften.


Süße Blumengrüße


Die klassische Variante Ostereier zu verzieren ist natürlich das Färben. Aber vielleicht wollt ihr  ja in diesem Jahr eure Lieben mit sehr kreativen Ostereier überraschen.


How to ...  Make Leaf Print Eggs


Anstatt des klassischen Färbens, versucht doch mal eine Schablonentechnik.
Werkzeug
  • Kleine Blätter ( Thymian, Farn, Pfefferminz etc.)
  • Gekochte Eier 
  • Nylonstrumpf, in ca 10cm lange Stücke schneiden
  • Wasser
  • Essig
  • Eierfarbe
  • Gummibänder
  • Große Gläser,ein Glas pro Farbe
  • Löffel
Anleitung
  1. How to ...  Make Leaf Print Eggs  - Step 1 Blättchen auflegen und dann das Ei in den Strumpf legen.
  2. How to ...  Make Leaf Print Eggs  - Step 2 Den Strumpf drehen und dann mit dem Gummiband befestigen.
  3. How to ...  Make Leaf Print Eggs  - Step 3  das Ei wird in die Eierfarbe gelegt.
  4. How to ...  Make Leaf Print Eggs  - Step 4 nach ungefähr 5 Minuten wird das Ei mit dem Löffel heraus gehoben und der Nylonstrumpf wird sorgfältig entfernt.
  5. Ich finde diese Eier ganz künstlerisch super. Was meint ihr????

Saturday, March 24, 2012

Ostergrüsse aus den USA

Hallo meine Lieben,


Hatte heute ein bisschen Zeit auf der Internet herum zu surfen. Ich dachte mir, dass es vielleicht für Euch interessant wäre zu sehen wie kreativ die  "Amis" sind. :)


Courtesy of http://todolwen.blogspot.com

Courtesy of http://todolwen.blogspot.com

Courtesy of http://todolwen.blogspot.com
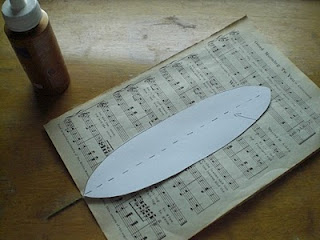
Ich habe  die folgende tolle Anleitung für eine Papierfeder bei Karen Bailey  gefunden. Kurz und gut... ich habe mich in diese Federn verliebt. Ich bin froh, dass ich sie noch vor Ostern gefunden habe, und hoffe,  dass diese Federn auch Euch gefallen. Viel Spass beim kreativen werkeln.

So geht's


Werkzeug

Osterfeder  (Notenblätter,Lexikonblätter oder alte Bücher)
- Schere
- Weissen Leim
- Cutter ( Drahtschneider)
- Draht (  ca 45cm lang)
- Festes Papier ( 240 - 260 g)
- Bleistift

Courtesy of http://todolwen.blogspot.com
Lade hier die Schablone herunter.
Courtesy of http://todolwen.blogspot.com

Der Draht (ca 35 cm/20cm) wir so gebogen, dass ein Ende ungefähr 3 cm länger ist.


Courtesy of http://todolwen.blogspot.com

Der Draht wird auf das ausgesuchte Papier geklebt. Nicht vergessen 3 cm unterhalb des Papiers den Draht hervor schauen lassen.

Courtesy of http://todolwen.blogspot.com


Jetzt wir ein zweites Blatt aufgeklebt. Trocknen lassen.


 Die Kartonageschablone wird  genau auf das Papier gelegt.


Courtesy of http://todolwen.blogspot.com

und die Umrisse der Schablone werden mit Bleistift übertragen.


Courtesy of http://todolwen.blogspot.com

Courtesy of http://todolwen.blogspot.com
Jetzt werden  die Schablonen zu Federn zugeschnitten, und voilà   

Die Federn sind Fertig!!!!


Viele liebe Grüße aus den USA


Eure 


Monday, March 19, 2012

Bloß nicht in den Müll:-))


Meine lieben  Faux Fan's,
ich kann Euch gar nicht sagen wie aufgeregt ich bin Euch meine kleine Story zu erzählen:
Kennt Ihr das auch?

Immer wenn ich meine alten, ausgedienten Messingtöpfe sah, habe ich mich geärgert. "Ihr kommt jetzt in den Müll", kam mir immer wieder der Gedanke. Ich stellte sie von einem Platz zum anderen. Und jedes Mal, wenn ich die Töpfe in die Hand nahm, war ich drauf und dran, die veralteten Dinger auf den Müll zu werfen, weil ich einfach nicht wußte, was ich noch damit anfangen sollte. Kurz entschlossen habe ich mich dann entschieden, eine Rettungsaktion zu starten. 
Was habe ich gemacht?
 
Ich habe sie ganz einfach "verrostet". R-O-S-T. Wunderbaren tollen Rost mit Schwarz. Gerade richtig für den beliebten Shabby Chic und Landhausstil.
Und so wird es gemacht!
Let's go, Ladies!!
Veredelt Eure ausgedienten Töpfe mit einer Spezialfarbe auf Wasserbasis ( jetzt auch in Deutschland erhältlich) und einem hohen Anteil von echten Metallpigmenten. Diese Metallfarbe wird als Grundfarbe für eine Rostpatina benutzt.
1. Gegenstand mit der schwarzen Metallfarbe unregelmäßig bestreichen und trocknen lassen.
2. Die schwarze Farbe wird mit Rost-Aktivator besprüht.
3. "gespannt davor sitzen bleiben und abwarten bis der Rost erscheint":-))
So leicht und einfach.......!!
Es gibt unendliche viele Möglichkeiten, die ich mir ausgedacht habe.
-Kerzenständer
-Urnen
-Gardinenstangen
-Plastiktöpfe 
-und vieles mehr...


alles kann "verrostet" werden.
Und jetzt habt Ihr eine wunderbare und edle Rostoptik.
Schreibt mir einfach eure Ideen und welche alten, ausgedienten Wohnaccesoires ihr verdelt habt!
Ich bin sehr gespannt auf Eure Kreativität!
Viel Spass und gutes Gelingen.
Alles Liebe, Eure 

Friday, March 9, 2012

Aus neu macht alt

Wunderbar was man so mit Farbe machen kann. Ich bin in den Landhausstil verliebt und freue mich dass ich Euch einer meiner "Werke" vorstellen darf.

Hier habe ich ein Sideboard meiner Kundin auf alt hergerichtet. Das Sideboard hatte sie ganz billig erstanden und ich wurde beauftragt es zu  verschönern, gemäss dem mediterranen Stil in den sie verliebt ist.

 Die Inspiration waren der rote Taft-, und Jacquardstoffe  die ich ausgesucht hatte.


Eine billige Kommode wir ein Juwel!!!

Aus neu mach


Alt ... ein Juwel

Rostoptik

Rostoptik

Mitte " Reisslack mit Craquelleure und Trompe l'oeil" Seiten: Schablonentechnik


Schablonentechnik mit Bronze, 24ct. Gold usw.

 Ich beantworte gern alle Fragen. Bis dann, man sieht sich- passt auf Euch auf. Alles Liebe Eure  Heidi